QuahogCon 2010 Badge Hardware Hacking – The Beginning
What I Did:
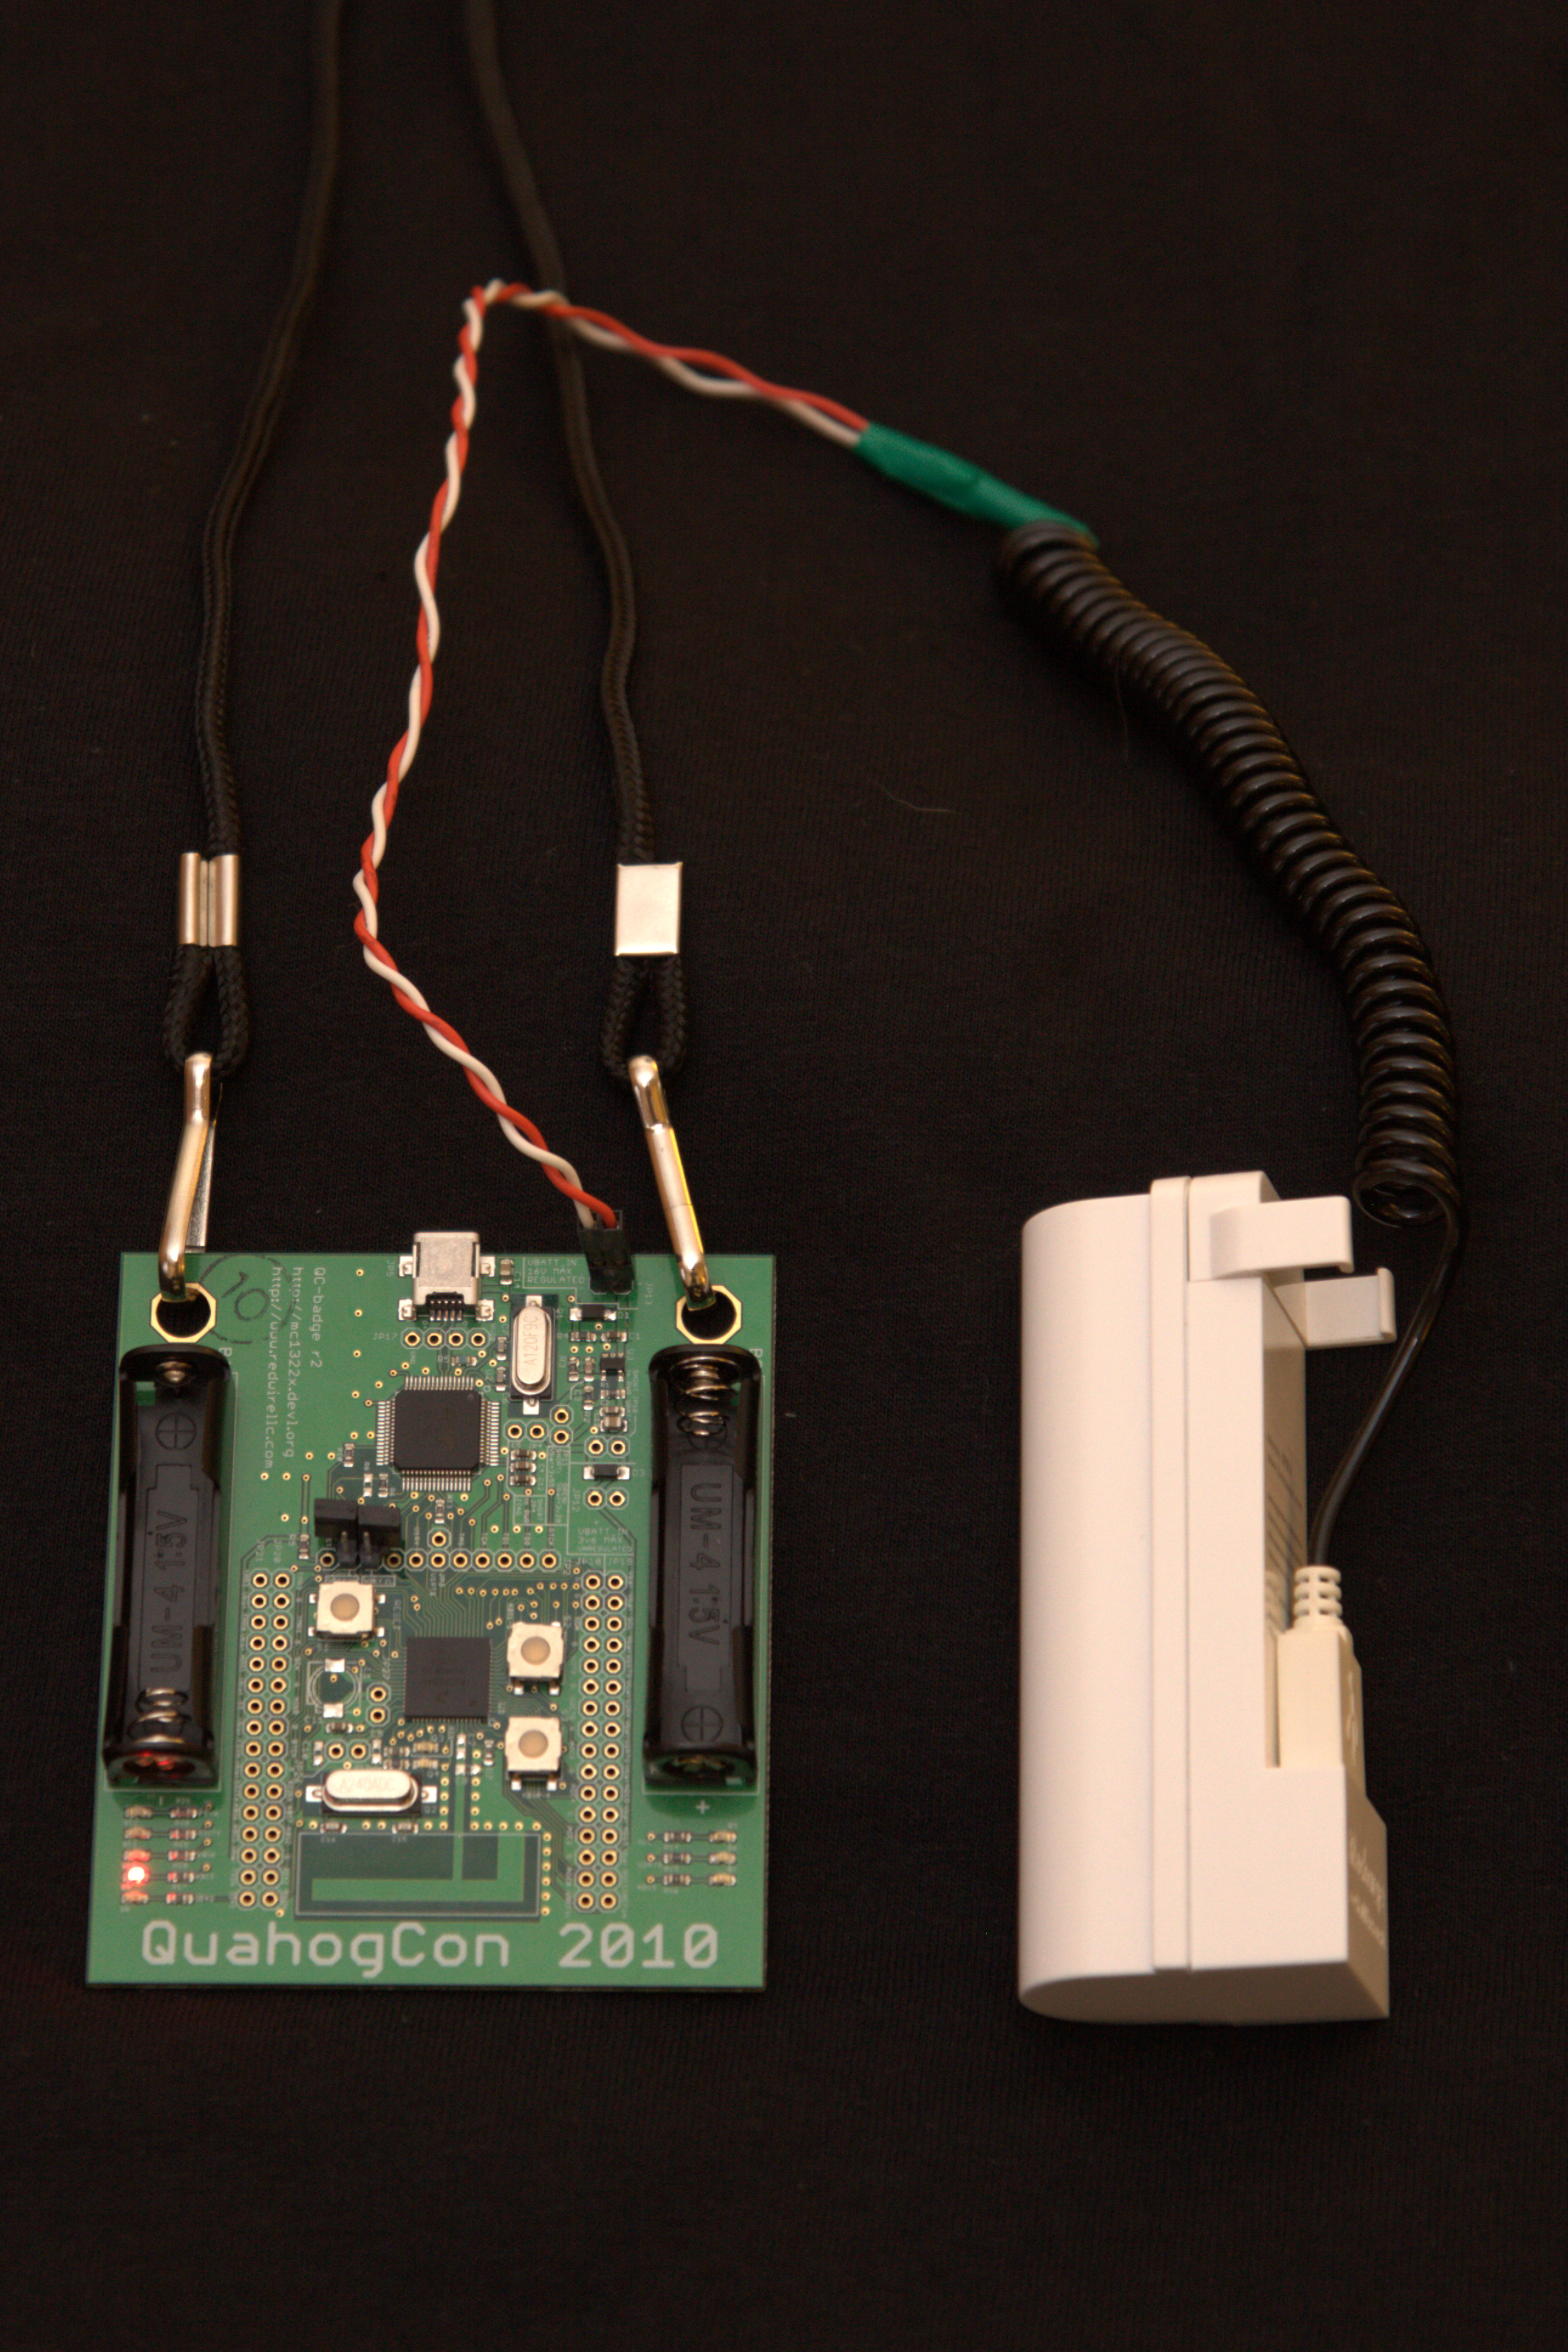
I took a Cellboost IPR3 that was otherwise destined for a dull life of providing power to an original iPod Shuffle, and converted the cable normally used for charging it into a USB-A-to-2-pin cable using the cable from an old computer case’s hard drive activity light. (Using the cable is a bonus for me, since this cable has been kicking around the
What I Wanted to Do:
I’ll be the first to admit this isn’t so much a ‘hack’ since it’s what the badge was designed to do. I had planned to populate the two 2×16 rows of headers with female headers, then put a piece of perfboard on top either with male headers pointed down or with female headers with double-length legs. The plan was to have something akin to an Arduino shield: Removable, changeable, and replaceable. What you see here is what I got done during the ‘con. I’ll post updates as I progress in badge-hacking now that the ‘con’s over.
About the Cellboost IPR3 Hardware
The Cellboost device contains 1 Li-Ion battery, 5V charging circuitry, and 5V output circuitry; the charging circuitry is the best part, since Li-Ions are a pain to charge otherwise. It includes a USB extension cable (USB-A Male to USB-A Female) that supplies power only (no wires for data) to charge the Cellboost unit with. The unit itself has a USB-A Male (for charging the Li-Ion) and a USB-A Female receptacle on it (for the iPod to plug into).
I acquired a number of these Cellboost devices from Princess Auto; at their last big clearance sale, they were on for (IIRC) $0.79 each. As an aside, I had someone at Quahogcon ask me if I had been to the MIT Garage Sale. Apparently they were sold there as well. Regardless, I still have 4 or 5 in their original packaging to be used to power other projects.