Flambeau Brake Control Demo Kit
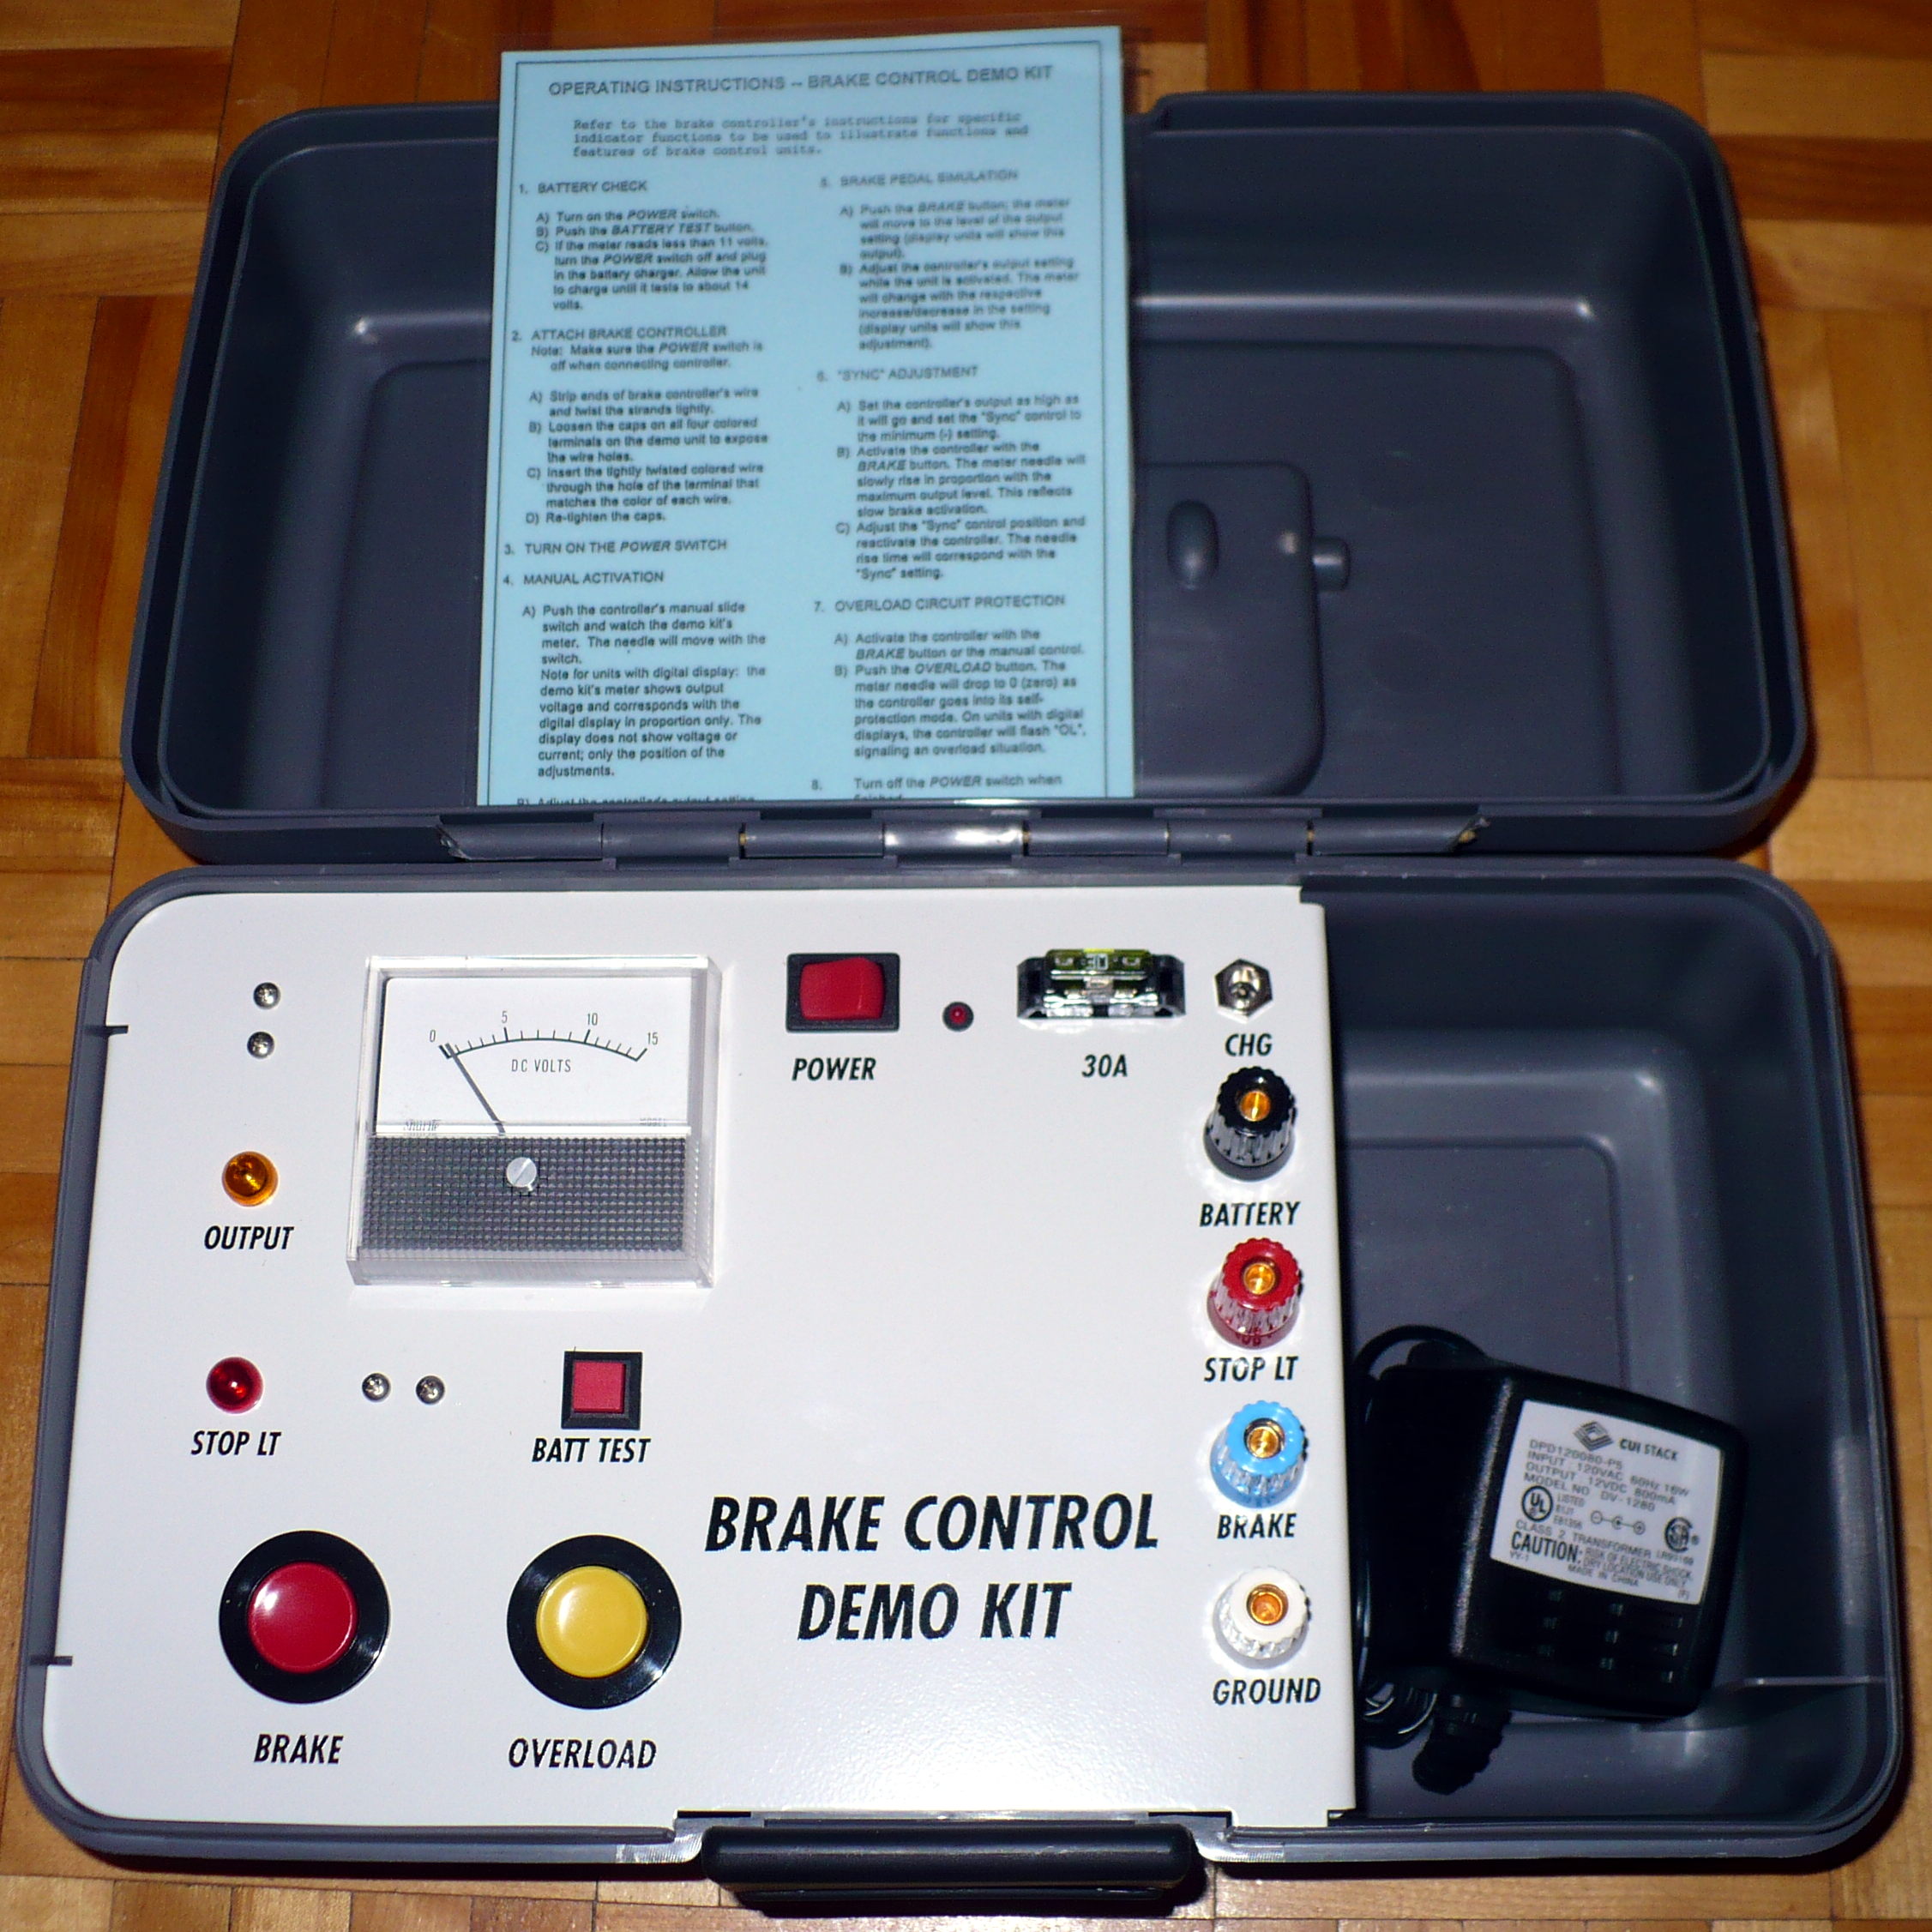
This is a nice item that I found today at Princess Auto… A grey box hiding on the bottom of a grey shelf. The phrase “Demo Kit” caught my eye, and I had to take a peek inside. I was blown away by the beautiful innards, and I just had to have it. It appears to be made by Flambeau (judging from the company name stamped into the front of the case) and the sticker on the lid says it is a “Brake Control Demonstration Kit”
A metal front panel (as seen in the picture) holds a set of terminals, a voltmeter, large Brake and Overload buttons along with various assisting components, such as Output and Stop lights, Battery test button, power switch, 30A removable fuse, and a panel-mount power plug that fits with the included wallwart.
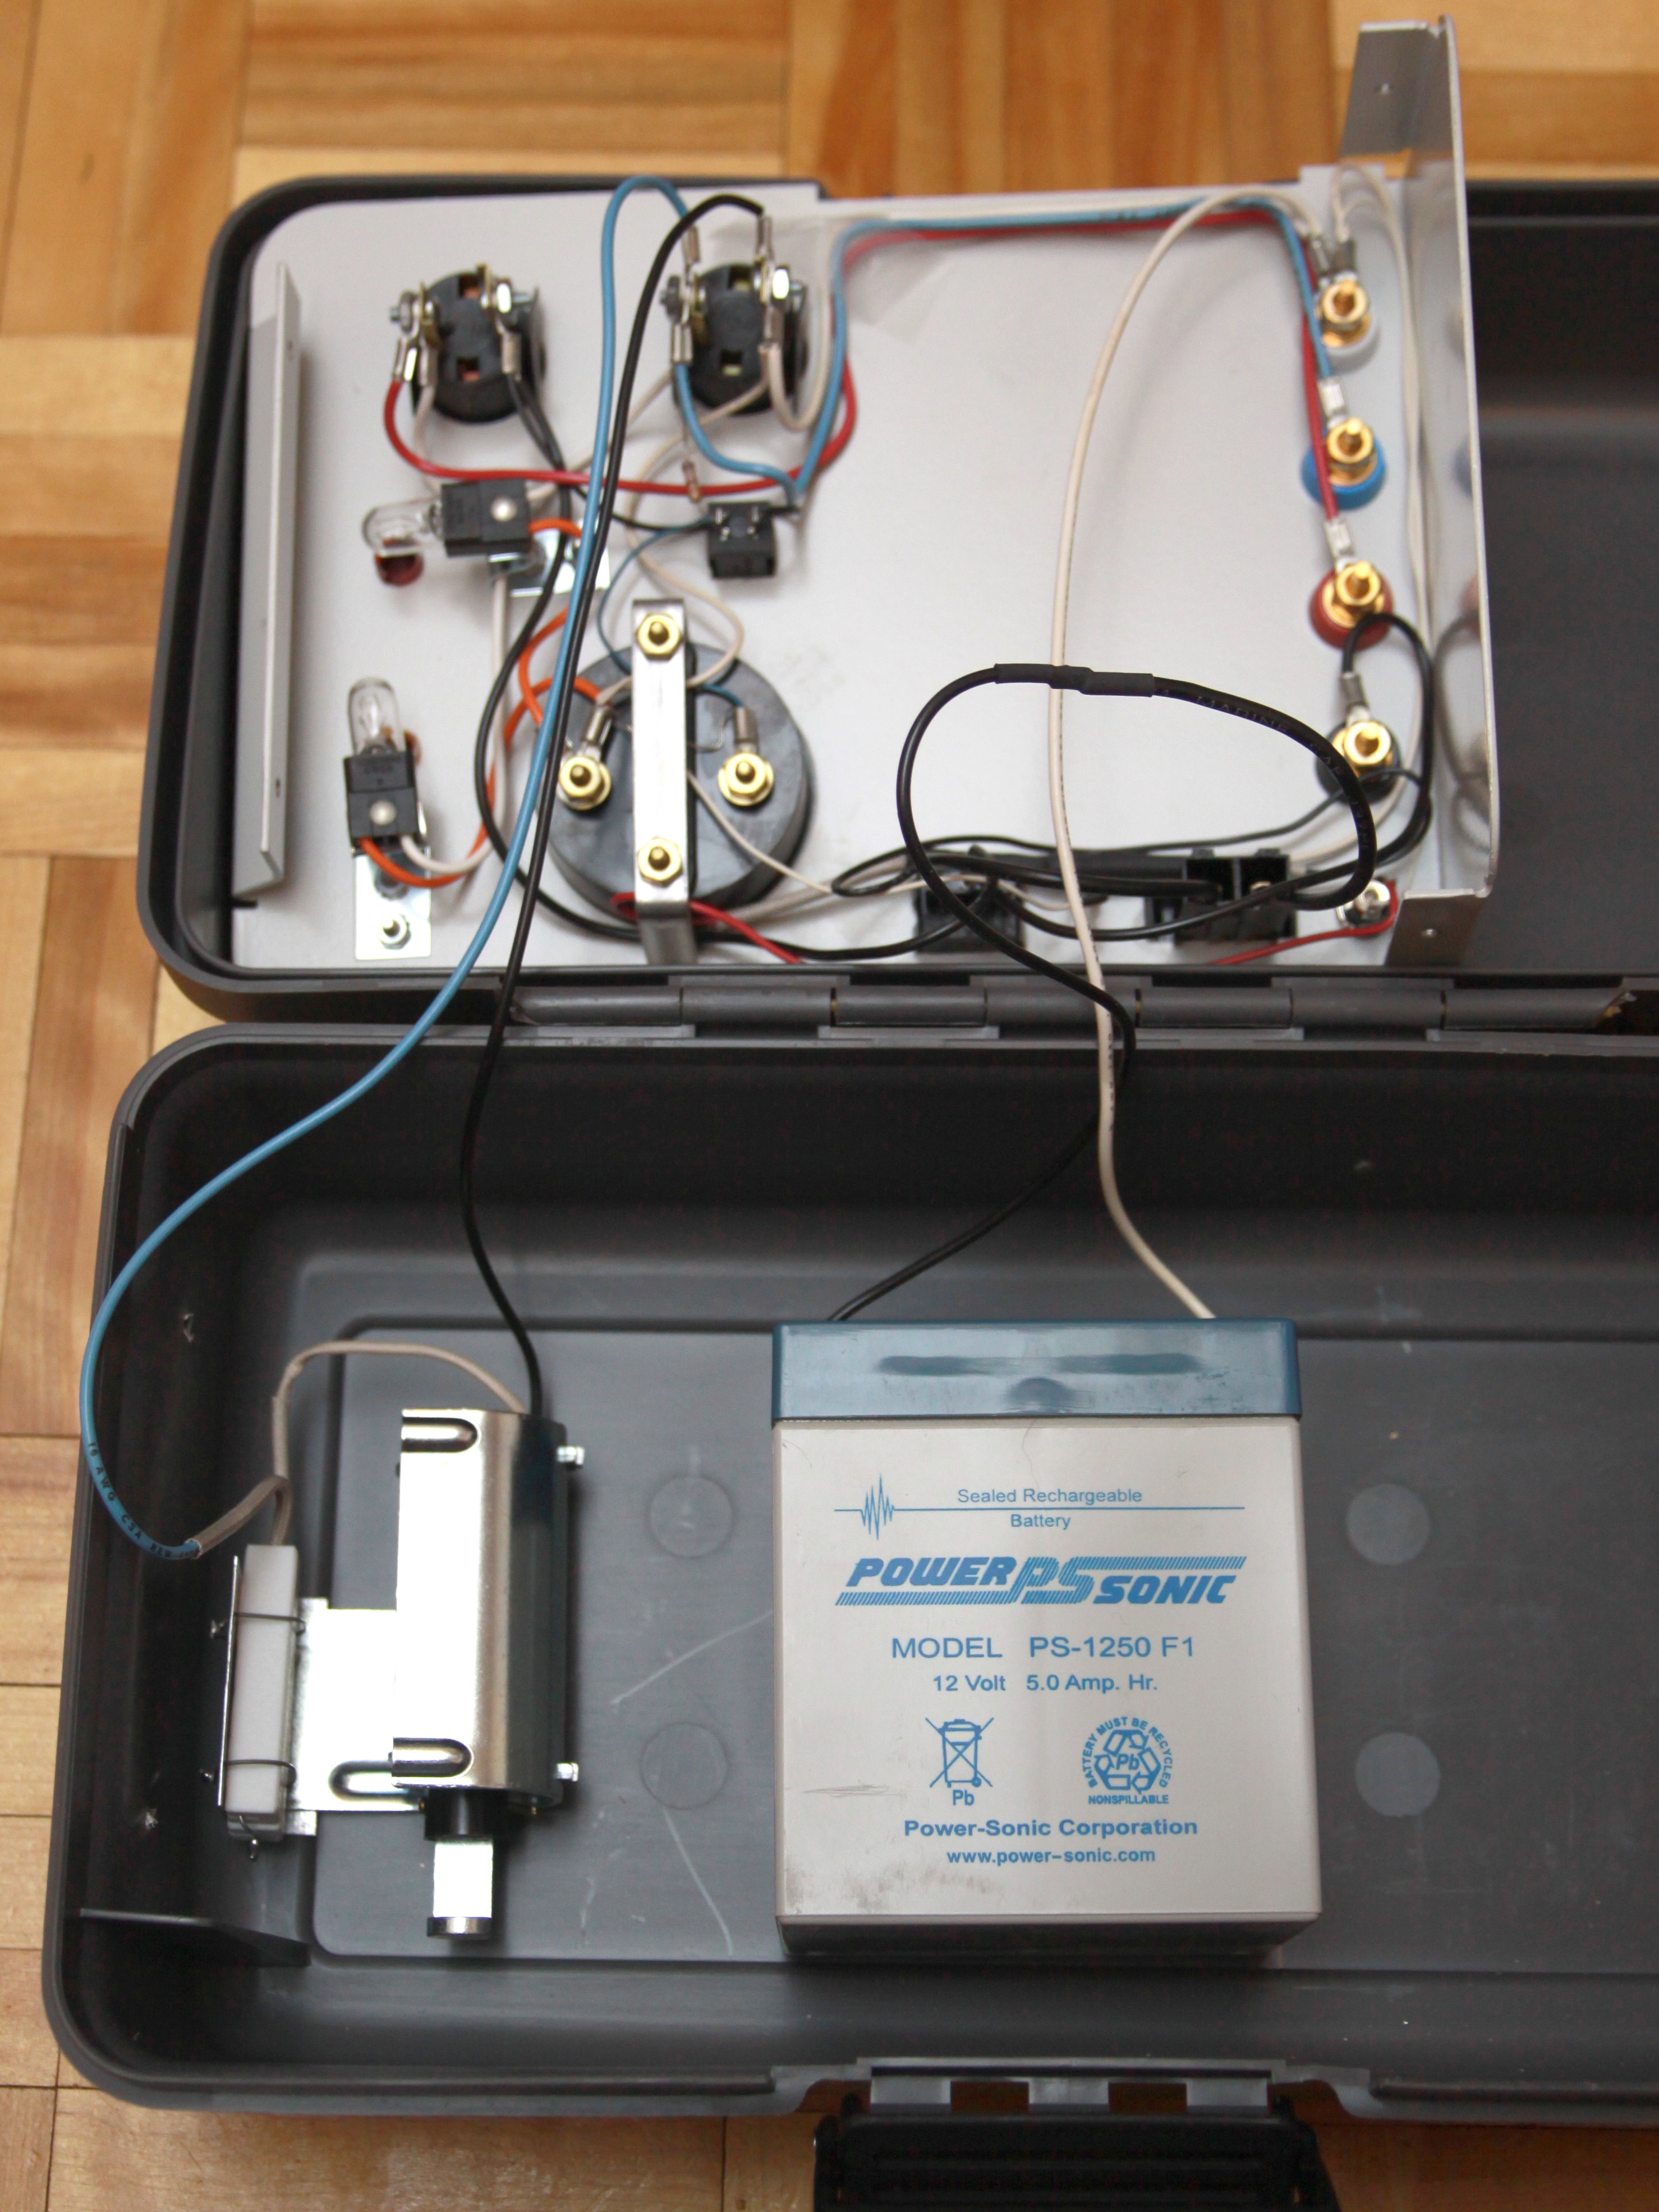
Underneath the panel (picture attached below), reside a 12 Volt, 5 Amp-Hour SLA (Sealed Lead Acid) battery for powering the kit, and some type of coil or capacitor for powering the ‘overload’ button.
Bonus points for the Output and Stop Light lamps: They’re actually incandescent bulbs, not LEDs. (The power light is an LED though, presumably so you can still see that the unit is not DOA even with a near-flat battery.)
Possible uses: (besides requisite attempts to blow various electrical components up with the Overload button)
- Portable bench power supply (With an adjustable voltage regulator, and maybe an LCD display for kicks?)
- (Have any suggestions to add? Sound off in the comments!)
(NB, this doesn’t show up on Princess Auto’s website, as it’s probably a new item. It is SKU #8339715 and
